A guide for how to put VPN in EC2
A collection of aws guides
Follow this guy, he's great. Saving his article for my own easy access: sonicjoy
My painful journey with a happy ending
[

](https://medium.com/@sonicjoy2002?source=post_page-----84b2c0a1d934--------------------------------)
Photo by Louis Hansel on Unsplash
This is not another “How to…” article to show you how to create your own VPN server. It can certainly show you how to do it, but it’s more about my struggles when I was on the bumpy journey. You may or may not run into the same issues, but if you do, hope this helps.
Why did I need an VPN?
I assumed that you know what a VPN (virtual private network) is, and what it does? If not, ask ChatGPT or Google it.
For personal reasons I needed to stay in Hong Kong for a few months and to work from there. And surprisingly, ChatGPT is not allowed there, including the API. That was very annoying and a blocker for my work (I was and have been working on a sports training planner powered by AI). Obviously a VPN service would be the answer, and I needed for a few months while I was in Hong Kong.

If you google “VPN” you would find loads of services online (sponsorship pending) that charge you about $12 USD or more a month and they offered some very enticing deal like $3 a month if you sign up for 24 months — yep, those 24 month deals putting me on a dilemma. I really just wanted to use ChatGPT and those API, and for the whole 5 months in Hong Kong I would have to pay $60 in total, or $72 for a 24 month deal.
With the pride of a software engineer, and more importantly, without income at the time, I decided to build my own VPN server. I knew the gist of how a VPN server works, and had the rough plan to utilise the free tier hours on AWS, it would take me no time to build a free VPN for myself. At least that’s what I thought.
The Happy Beginning
With the help of our good old friend Google, I quickly found a walk-through, that’s exactly what I needed. “I can get it done in a hour.” I thought with confidence after a glance. Oh man, how wrong was I.
I had my own AWS account, so I could skip the whole step to create AWS account and proceed to create the EC2 instance. Of course I would use only the ones within the AWS free tiers, so a t2.micro instance with Amazon Linux AMI, and here comes the first trap.
I was presented with a few choices of Amazon Linux AMI:
- the latest Amazon Linux 2023 AMI
- the previous Amazon Linux 2 AMI (HVM) — Kernel 5.10, SSD Volume Type
- the .NET included Amazon Linux 2 with .NET 6, PowerShell, Mono, and MATE Desktop Environment
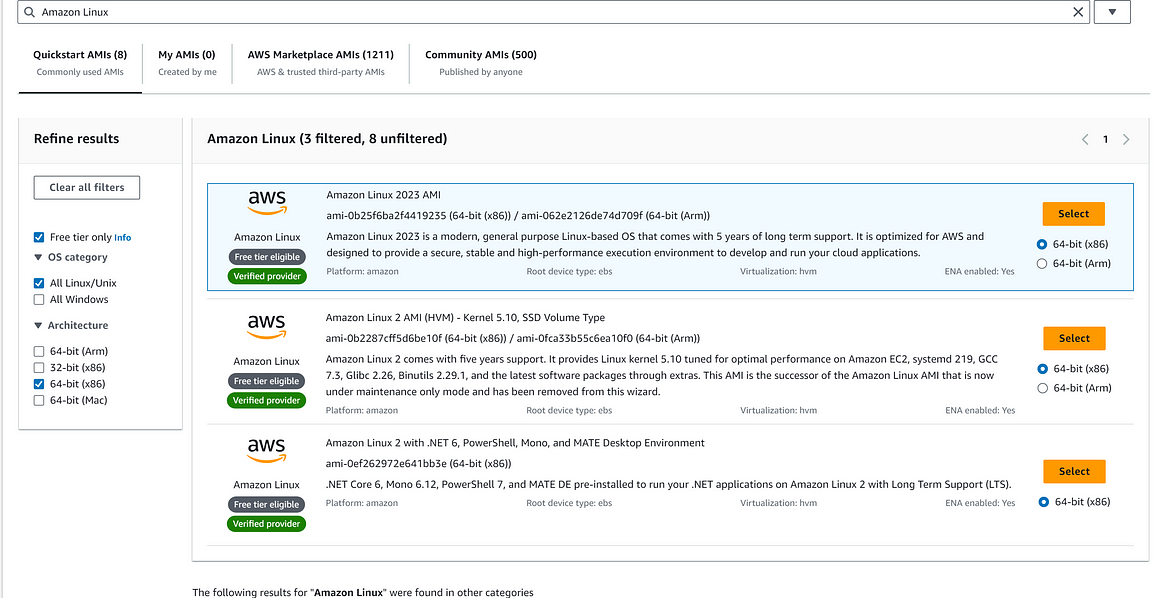
With a momentary of hesitation and a quick read through the descriptions, I chose the latest Amazon Linux 2023 AMI (huge mistake!). Then I went ahead and setup the rest of the configuration, make sure to enable the public IP address before you hit the launch button.
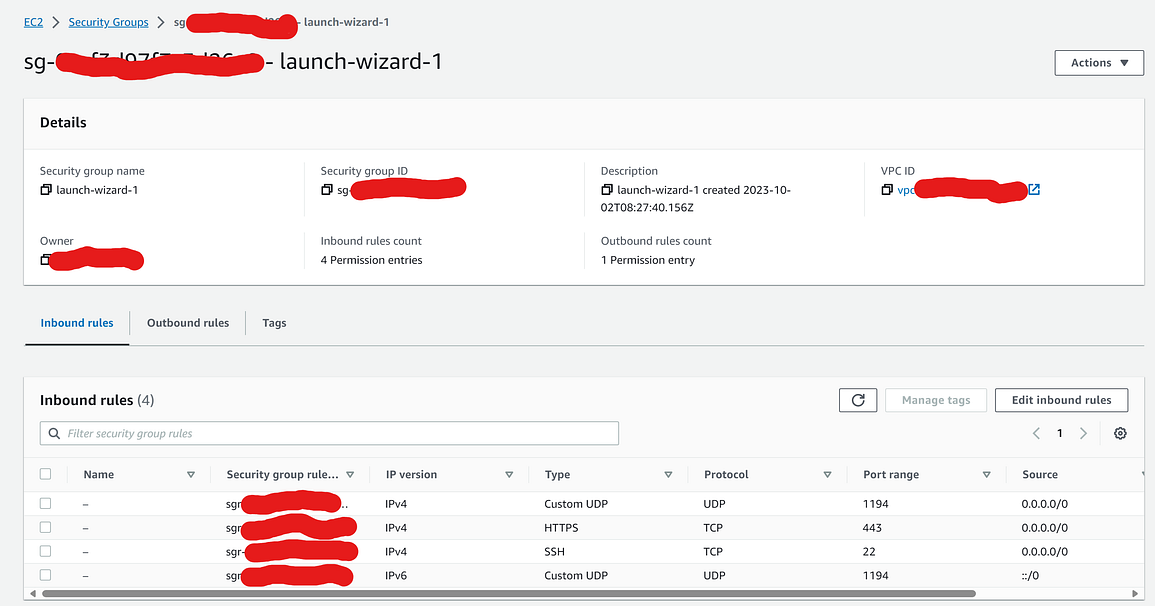
In the security group page, add a couple of Custom UDP rules for the inbound accesses for port 1194.
You need to create a new key pair for SSH into your instance. Make you you down load the *.pem file, you will need that later.
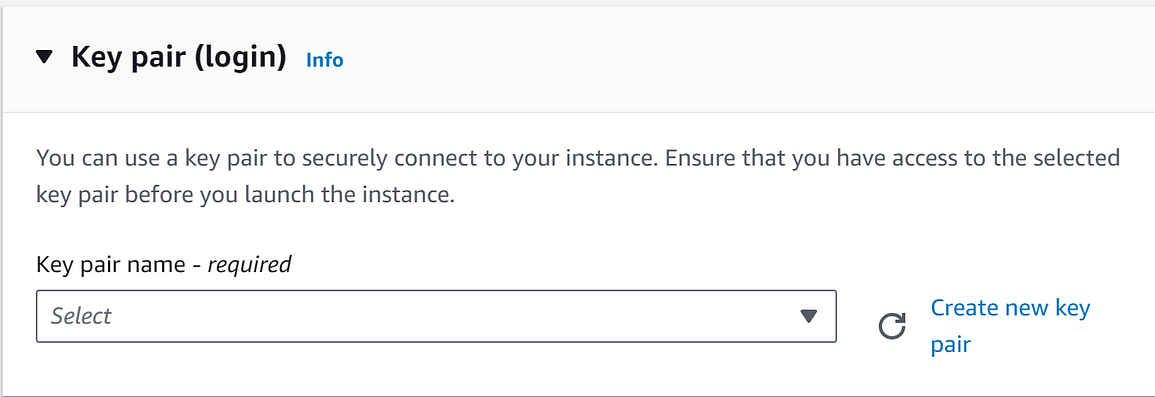
Following the article, I downloaded and installed PuTTy, loaded the key pair file I downloaded earlier and saved it as private key. You can use the terminals and SSH but what PuTTy can do is saving all the session details for you for future access. I flied through the step here, but if you need to know how, go back to the walkthrough article.
When you finally hit the “Open” button to get on the EC2 instance, it would ask for a username, it’s “ec2-user” for Amazon Linux AMI, if you like me had a panic attack for a few seconds. I still don’t know where this username is coming from, but surely AWS must have told the users clearly in BOLD somewhere, right!? I must have missed it.
The First Blood
Hope you are familiar with Linux and all the common commands, as we are going into the dark side now.
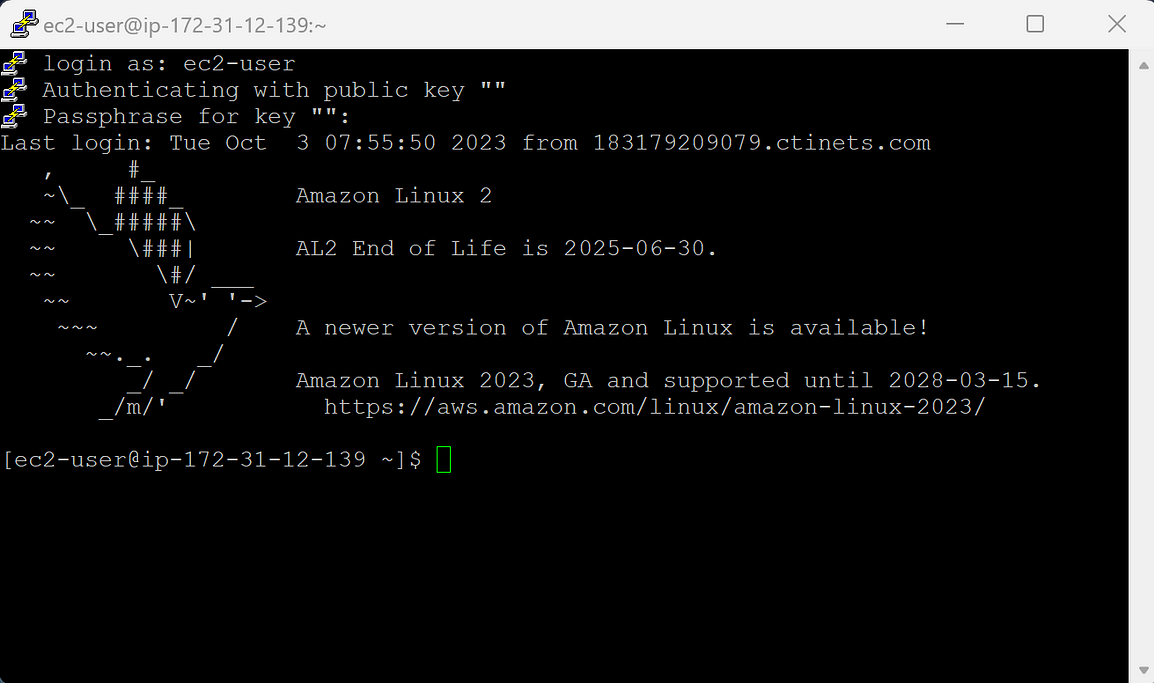
When you Open the SSH from PuTTy onto your EC2 instance, you will enter the Amazon Linux server. Now it’s time to install OpenVPN by entering sudo yum install -y openvpn easy-rsa and I got this “No match for argument: openvpn”. What the hell?
I’ll spare you the details painful research and trying various methods. After 6 hours (!) of countless failures, I gave up. Turned out, Amazon Linux 2023 AMI is missing the extra packages including OpenVPN and for some reasons it does not allow you to add it. Avoid Amazon Linux 2023 AMI if you want to install OpenVPN.
So I redid all the previous step from creating new EC2 instance, this time I chose Amazon Linux 2 AMI (HVM) — Kernel 5.10, SSD Volume Type, and I noticed in the description: “and the latest software packages through extras”. Yes you need that extra packages!
The Nightmare of Server Configuration
Ok now we are happily on our way to install the OpenVPN and Easy-RSA, commands as follows:
sudo yum install -y openvpnsudo modprobe iptable_natecho 1 | sudo tee /proc/sys/net/ipv4/ip_forwardsudo iptables -t nat -A POSTROUTING -s 10.4.0.1/2 -o eth0 -j MASQUERADEsudo iptables -t nat -A POSTROUTING -s 10.8.0.0/24 -o eth0 -j MASQUERADEsudo yum install easy-rsa -y - enablerepo=epelsudo cp -via /usr/share/easy-rsa/2.0 CA
And then bang, “cp: cannot stat ‘/usr/share/easy-rsa/2.0’: No such file or directory”. So I looked into the directory, and yep, I had easy-rsa 3.0, and 3.0.8 as of time of writing this. This is a common issue of internet when you follow an instruction that’s too old. And surprise, surprize, the instruction of configuring using 2.0 is no longer valid for 3.0, the commands are not working. Shall I use 3.0 or 3.0.8 instead? Fine, I googled and found another newer instruction and we were on the route again.
I set up the certificate authority, built the keypair, generated the Diffie-Hellman key, created server certificate and signed it, created client certificate and signed it, and finally generate a TLS key for OpenVPN. All the commands are as follows:
sudo mkdir /etc/openvpn/easy-rsacd /etc/openvpn/easy-rsasudo cp -Rv /usr/share/easy-rsa/3.0.8/*sudo ./easyrsa init-pki sudo ./easyrsa build-casudo ./easyrsa gen-dhsudo ./easyrsa gen-req server nopasssudo ./easyrsa sign-req server serversudo ./easyrsa gen-req client nopasssudo ./easyrsa sign-req client clientcd /etc/openvpnsudo openvpn --genkey --secret pfs.key
Now it’s time to configure the server. We do it by creating and editing the /etc/openvpn/server.conf file:
cd /etc/openvpnsudo nano server.conf
You need to enter the following in the file:
port 1194proto udpdev tunca /etc/openvpn/easy-rsa/pki/ca.crtcert /etc/openvpn/easy-rsa/pki/issued/server.crtkey /etc/openvpn/easy-rsa/pki/private/server.keydh /etc/openvpn/easy-rsa/pki/dh.pemcipher AES-256-CBCauth SHA512server 10.8.0.0 255.255.255.0push "redirect-gateway def1 bypass-dhcp"push "dhcp-option DNS 8.8.8.8"push "dhcp-option DNS 8.8.4.4"ifconfig-pool-persist ipp.txtkeepalive 10 120comp-lzopersist-keypersist-tunstatus openvpn-status.loglog-append openvpn.logverb 3tls-servertls-auth /etc/openvpn/pfs.key
Not so hard right? Wait, have you noticed all the directories above that point to all the new certificates, keys etc. we generated earlier. Hope you have noted down all the locations of them because there is no room for mistake here. Alternatively you can move them all to the same directory like /etc/openvpn/keys, for ease of life.
If you have followed through the steps above and nothing hit you with surprises, then congratulations! You are ready to start the OpenVPN service:
sudo service openvpn startsudo chkconfig openvpn on
And bang, again: “Redirecting to /bin/systemctl start openvpn.service
Failed to start openvpn.service: Unit not found.” I knew it wouldn’t be so easy, if it ever was easy.
2 hours later, I figured out the correct way to start it is as follows, thanks to this post:
systemctl start [email protected]
And having it auto-start on bootstrap we should use
systemctl enable [email protected]
I wondered why the original commands in the instruction would work for others?
The Final Hurdle of Client Configuration
Finally, we started the OpenVPN server, it’s time to setup the client. Firstly, we need to download the keys and certificates using WinSCP and make sure we set the permissions on those files to allow downloading. On the server with root privileges, run the following commands.
cd /etc/openvpnmkdir keyscp pfs.key keyscp /etc/openvpn/easy-rsa/pki/dh.pem keyscp /etc/openvpn/easy-rsa/pki/ca.crt keyscp /etc/openvpn/easy-rsa/pki/private/ca.key keyscp /etc/openvpn/easy-rsa/pki/private/client.key keyscp /etc/openvpn/easy-rsa/pki/issued/client.crt keyschmod 777 *
Then get WinSCP to download these files. For detailed steps of using WinSCP please refer to the instruction. Remember to delete the ca.key file from server and restore the permission of all the keys, for the sake of security.
Then install OpenVPN, and move all the downloaded files into C://Program Files//OpenVPN//config
Lastly, create the config file with name client.ovpn and copy the following, according to the original instruction but there are some traps:
clientdev tunproto udpremote YOUR.EC2.INSTANCE.IP 1194ca ca.crtcert client.crtkey client.keytls-version-min 1.2tls-cipher TLS-ECDHE-RSA-WITH-AES-128-GCM-SHA256:TLS-ECDHE-ECDSA-WITH-AES-128-GCM-SHA256:TLS-ECDHE-RSA-WITH-AES-256-GCM-SHA384:TLS-DHE-RSA-WITH-AES-256-CBC-SHA256cipher AES-256-CBCauth SHA512resolv-retry infiniteauth-retry nonenobindpersist-keypersist-tunns-cert-type servercomp-lzoverb 3tls-clienttls-auth pfs.key
Obviously you need to change YOUR.EC2.INSTANCE.IP to the real IP. When you connect with the configuration above, the OpenVPN will tell you to change ns-cert-type to remote-cert-tls and it’s missing data-ciphers for AES-256-CBC .
So I changed the corresponding lines into:
data-ciphers AES-256-GCM:AES-128-GCM:CHACHA20-POLY1305:AES-256-CBCremote-cert-tls server
However it is still failed to connect. When I checked the OpenVPN server log at /etc/openvpn/openvpn.log It contains “Authenticate/Decrypt packet error: packet HMAC authentication failed”. Apparently, authentication failed. But why?
Another hour of research, this post saved me, and I was missing this line in the client.ovpn file as we have configured the server to use tls-auth:
key-direction 1
So, why it would be missing from the original instruction is really puzzling me.
Finally, we are here and connected with our own OpenVPN server for free (not so much considering the time and effort it took to set it up).

Final Words
This was my own journey of setting up VPN server using OpenVPN on AWS EC2 with the minimum cost in mind. If you are struggle with all the technical details, it would be much easier just pay for one of those VPN services out there. However if you have the gut to go through the setup like I did, I’m sure you will learn a lot. Hopefully this post will help you avoid the same issues I encountered.
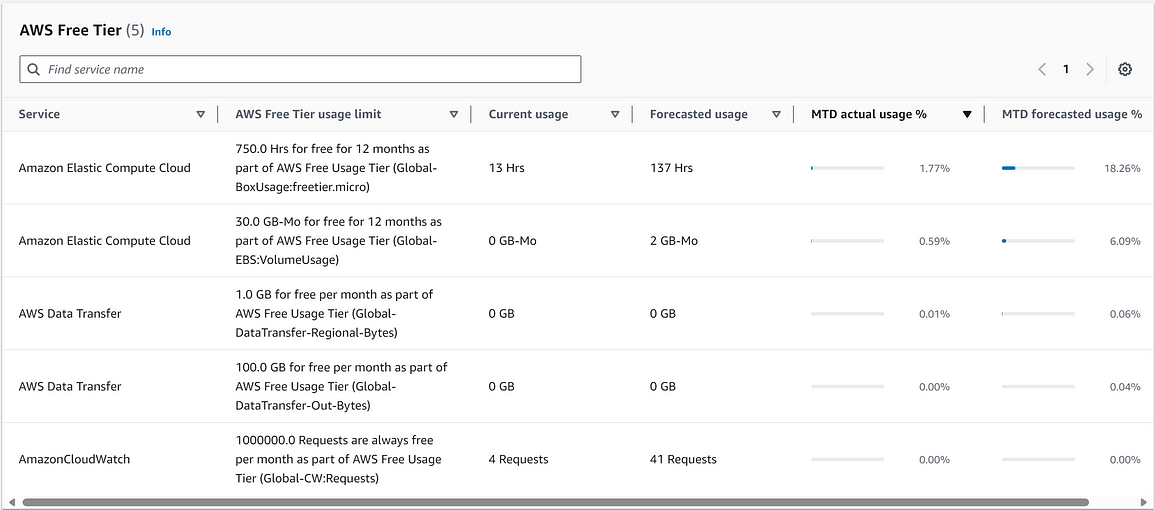
By the way, there is a limit on the AWS Free Tier for EC2 service, currently at 750 Hrs per month for the first 12 month. You will still need to pay if you go over that limit.
